Installation & usage guide:
1. Download & Install MyPi Server.
2. Run & test MyPi Server.
3. Load MyPi Server on boot.
4. Server Settings & GPIO configuration.
5. Watch MyPi Demo on YouTube.
6. Watch this Tutorial on YouTube.
7. Relays and switches connection diagram.
Download & Install MyPi TCP Server:
- Open Termial or connect to your Raspberry Pi by ssh.
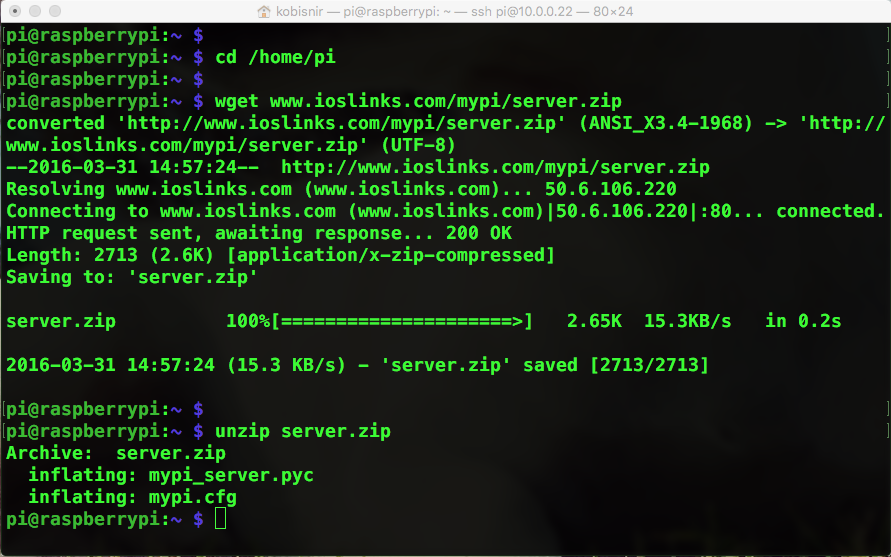
- Change the current directory to /home/pi by typing:
cd /home/pi
- Download MyPi TCP Server by typing:
wget www.ioslinks.com/mypi/server.zip
- Unzip the package by typing:
unzip server.zip
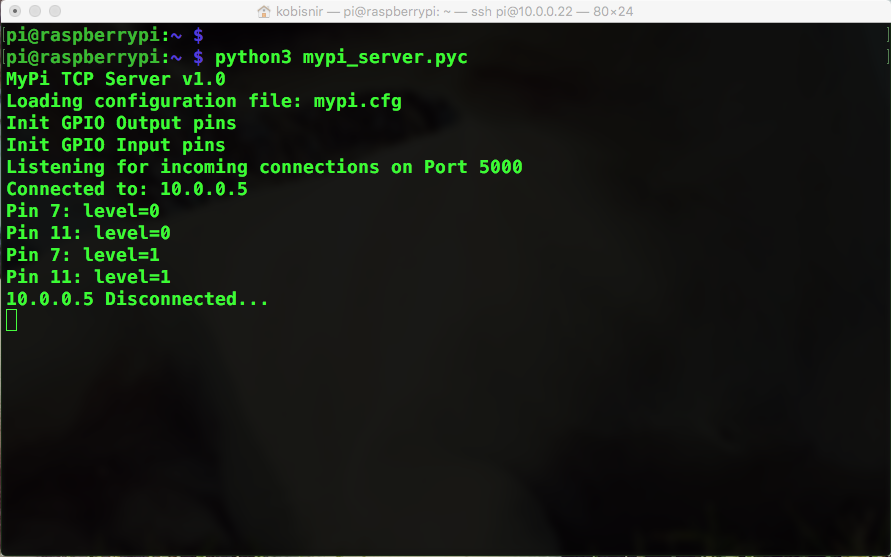
Run & test MyPi Server:
- Start MyPi Server by typing:
python3 mypi_server.pyc
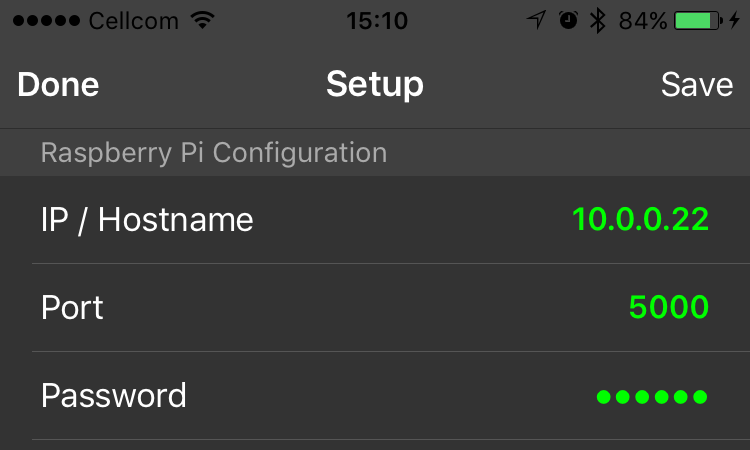
- Launch MyPi iOS App and click the gear icon.
- Replace IP with your Raspberry Pi IP Address.
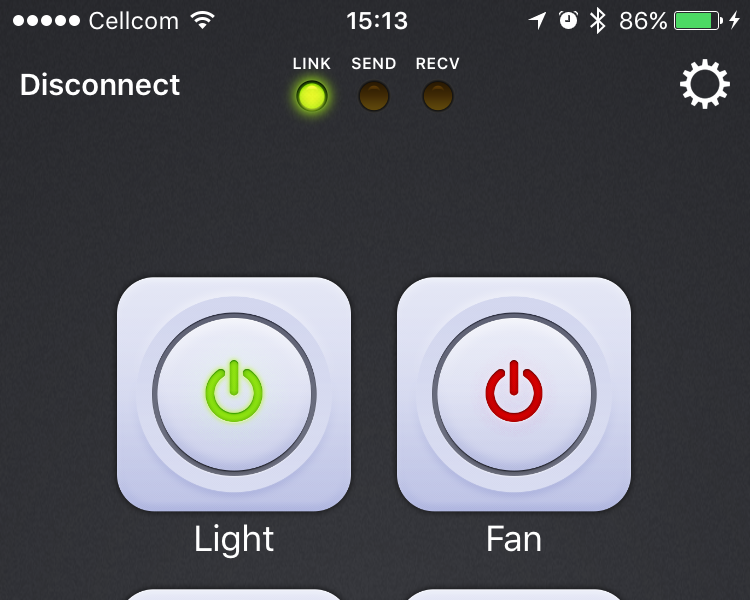
- Click Save and from the main screen click Connect.
- Tap any button to chage GPIO status.
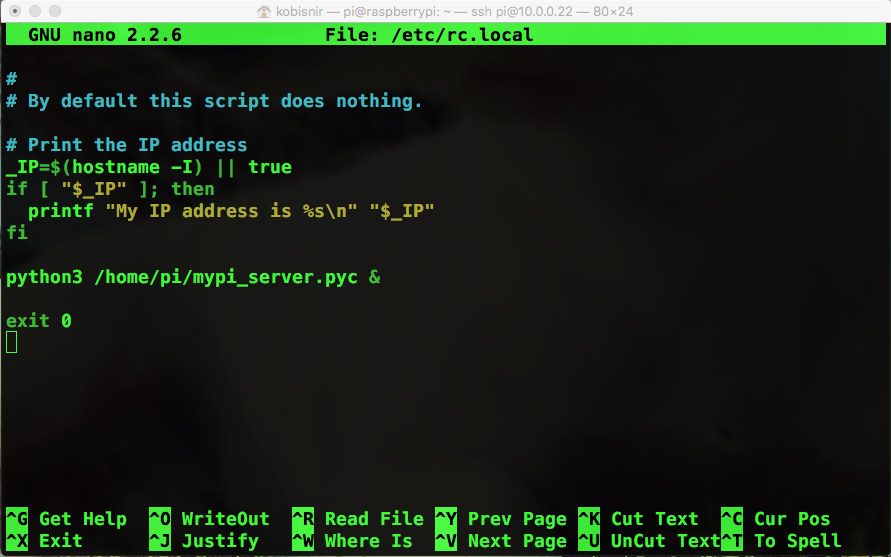
Load MyPi Server on boot:
- Stop MyPi Server by pressing CTRL C twice.
- Edit rc.local file by typing:
sudo nano /etc/rc.local
- Scroll down and type the following command BEFORE the exit 0 line:
python3 /home/pi/mypi_server.pyc &
- Save changes by pressing CTRL O and ENTER.
- Quit by pressing CTRL X.
- Reboot your Raspberry Pi by typing:
sudo reboot
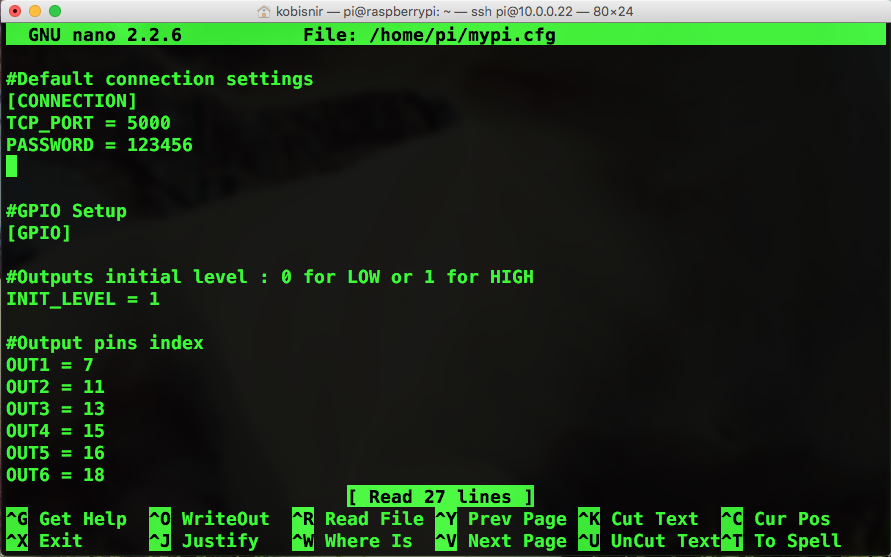
Server Settings & GPIO configuration:
-
MyPi Default configuration:
- TCP Port : 5000
- Connection Password : 123456
- Initial output level : 1
- Output pins : 7,11,13,15,16,18,19,21
- Input pins : 29,31,32,33,36,37,23,24
- Output modes : T = Toggle , M = Momentary.
- Delay : 1.0 (in seconds, applys only when output mode is momentary).
-
You can chage the default configuration by performing the following steps:
- Open Termial or connect to your Raspberry Pi by ssh.
- Edit mypi.cfg file by typing:
sudo nano /home/pi/mypi.cfg
- You can change the default Port and Password, initial GPIO output level, You can also change the physical pin number for each Input or Output list.
- If you change the default Port or Password make sure to update the iOS App as well.
- Save changes by pressing CTRL O and ENTER.
- Quit by pressing CTRL X.
- Reboot your Raspberry Pi by typing:
sudo reboot
MyPi demo:
MyPi Server installation guide:
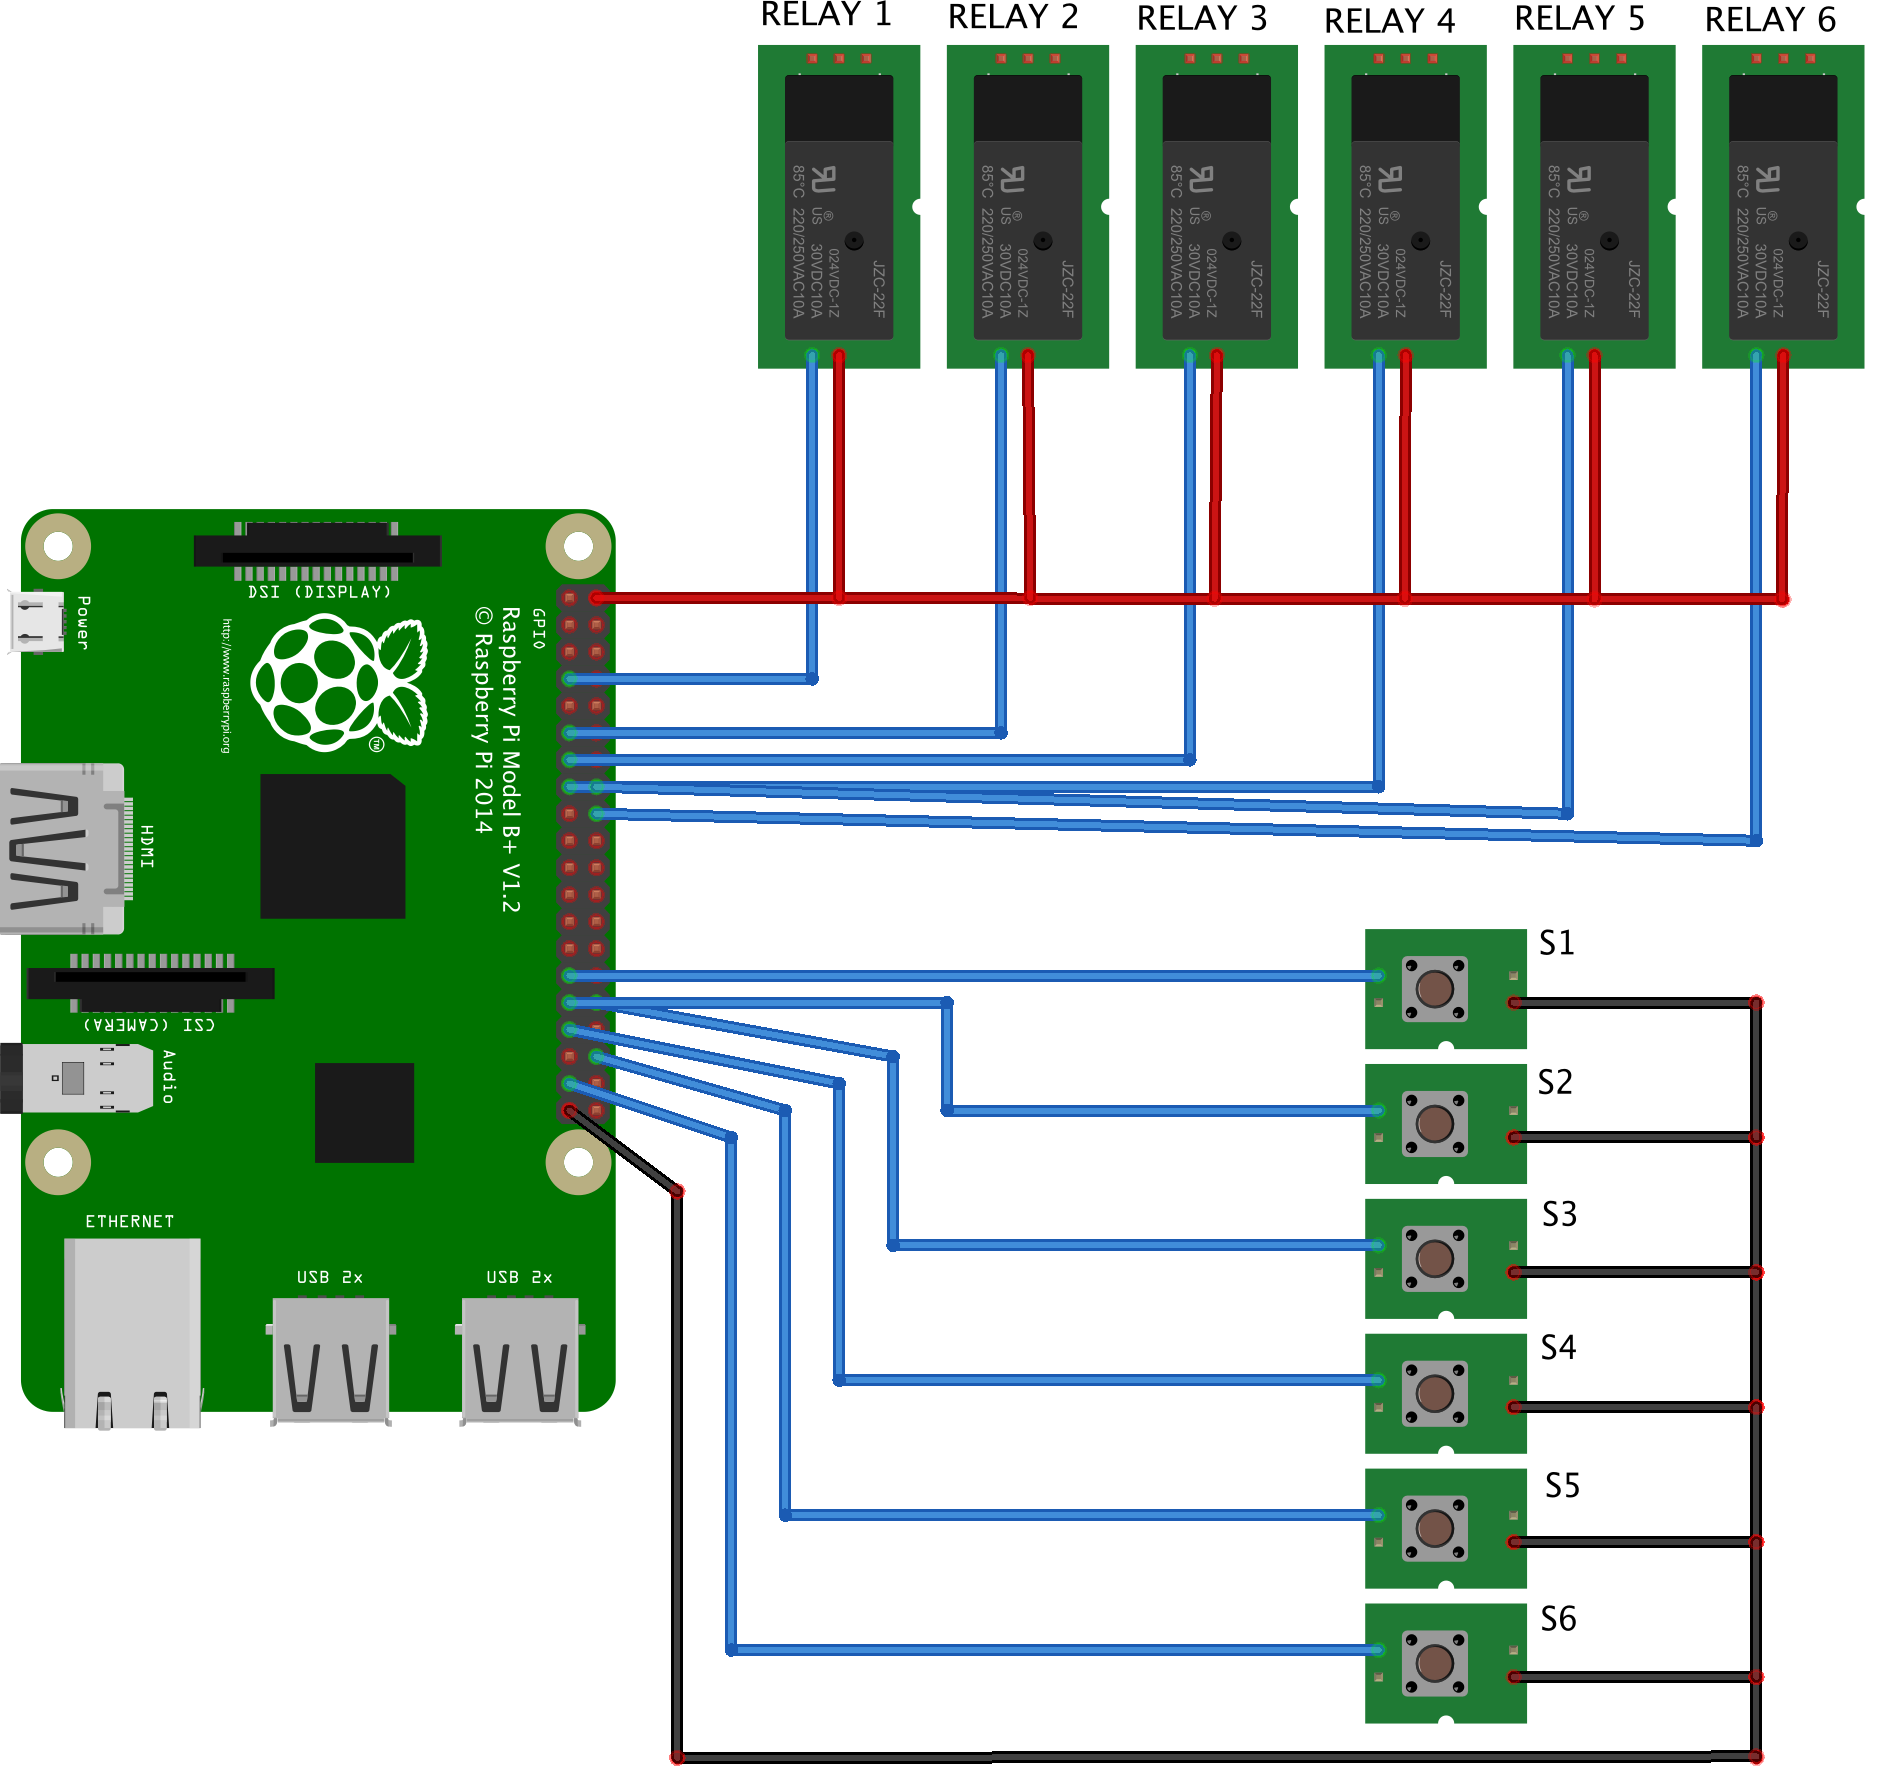
Relays and switches connection diagram.
- Connect your relays to the output pins : 7,11,13,15,16,18,19,21
- Connect your switches to the input pins : 29,31,32,33,36,37,23,24